Saturday, 16 April 2011

Springtime hummus- ful

Passover is right by the doorstep. The entire country is now in a fully blown OCD cleaning craze (they don’t call it spring clean for nothing). As per usual they are caught out in a sand storm the day before anything and everything has been boiled, bleached, disinfected and purified . Despite my affection for a good clean up, I’m happier in the kitchen where spring is in full bloom and in all its glory in preparation for the Spring celebrations, now underway, consisting on the most part of local and seasonal ingredients. That is, if I count out the (not Kosher by any account) chorizo. Even I have my limits and passing on a chorizo is one of them, so we're having it grace us with its presence in the table.

Lets not forget the cultural, traditional and religious ban on leavened goods during passover when anything made with any kind of cereal, including flour is a no-no. This has the potential of a disaster but mainly, it poses an interesting challenge when planning the festive dinner. however, with the cornucopia of seasonal produce available this time of the year one wouldn't even notice its absence. Green fava beans, green peas, green garlic and green almonds have the stage all to themselves, all lights are on them, au naturale and in the nude without bread, dough or pasta to outshine and overcast their glory.

Shopping lists have been written and crossed off as one by one all the products and ingredients are piling up. A 2kg happy reared leg of lamb? Check. 1kg of fresh chicken livers for making chopped liver? Check. Enough wine for 12 thirsty diners (who also happen to be my close family)? Check. What better way to celebrate Spring then by cooking it, serving it on a plate and eating it?

hummus- ful is a highly popular local combination of cooked and mashed dried fava beans seasoned and served over hummus with pita bread on the side. Both chickpeas and fava beans have been cultivated and consumed in the area since the beginning of times. This is as local as food gets; cheap, nourishing and satisfying resulting in both staples gaining mythological status in the local cuisine.

This is my deconstructed, springtime version of hummus- ful.

Happy Springtime.

Springtime hummus- ful

(Serves 2-4)


Ingredients

2 cups chickpeas, soaked overnight in plenty of water, then strained

1 garlic clove

Several sage leaves

2 cups green fava beans, removed from their pod

1 ripe avocado

1 green chili pepper, deseeded and chopped

1 scallion, finely chopped

Zest from ½ lemon

2-3 garlic cloves, finely chopped. If in season, use green garlic

Sea salt, to taste

Freshly ground pepper, to taste

1 lemon, juiced

Olive oil

Serve with:

Coriander leaves, washed

A handful of pistachios, roasted in a dry skillet and coarsely chopped

Sheep’s milk ricotta or other fresh cheese, crumbled

  1. Prepare the chickpeas: place the strained chickpeas in a large saucepan. Add the garlic clove and sage leaves, cover with plenty of water and bring to a boil, skimming off the froth. Reduce the heat and simmer for about an hour. When the chickpeas are soft but not mushy, remove from the heat and strain.
  2. Prepare the fava beans: bring a large saucepan with plenty of salted water to a boil and prepare a bowl of ice water. Blanche the fava beans for 1-2 minutes. Using a slotted spoon transfer the beans to the ice water, to stop them from cooking further. remove the beans’ outer shell.
  3. Heat a large frying pan with a little oil and lightly fry the cooked chickpeas, until they are tanned.
  4. In a large bowl mix the fried chickpeas and fava beans together. Using a teaspoons, scoop the avocado into the bowl.
  5. Add the chopped chili pepper, scallion, lemon zest and garlic. Season with lemon juice, olive oil, salt and pepper. Taste and adjust the seasoning, if needed.
  6. Sprinkle the coriander leaves, chopped pistachio and crumbled cheese and serve.

* Note: you can find the traditional recipe for hummus- ful here and here.

Saturday, 9 April 2011

Beans, they way I remember Tuscany

As part of my job at the Tel Aviv covered market, located a convenient 10 minutes cycle from my abode, I'm lucky enough to be surrounded with local and global, seasonal and random produce, all on a weekly, if not daily, basis. So much so that my trips to the supermarket have narrowed down to purchasing toilet paper, flour and sugar, and yes, also on those rare midnight cravings for an onion, a bell pepper, or a chocolate bar a supermarket has come in handy and to my aid, along with its bright and flickering fluorescent lighting.

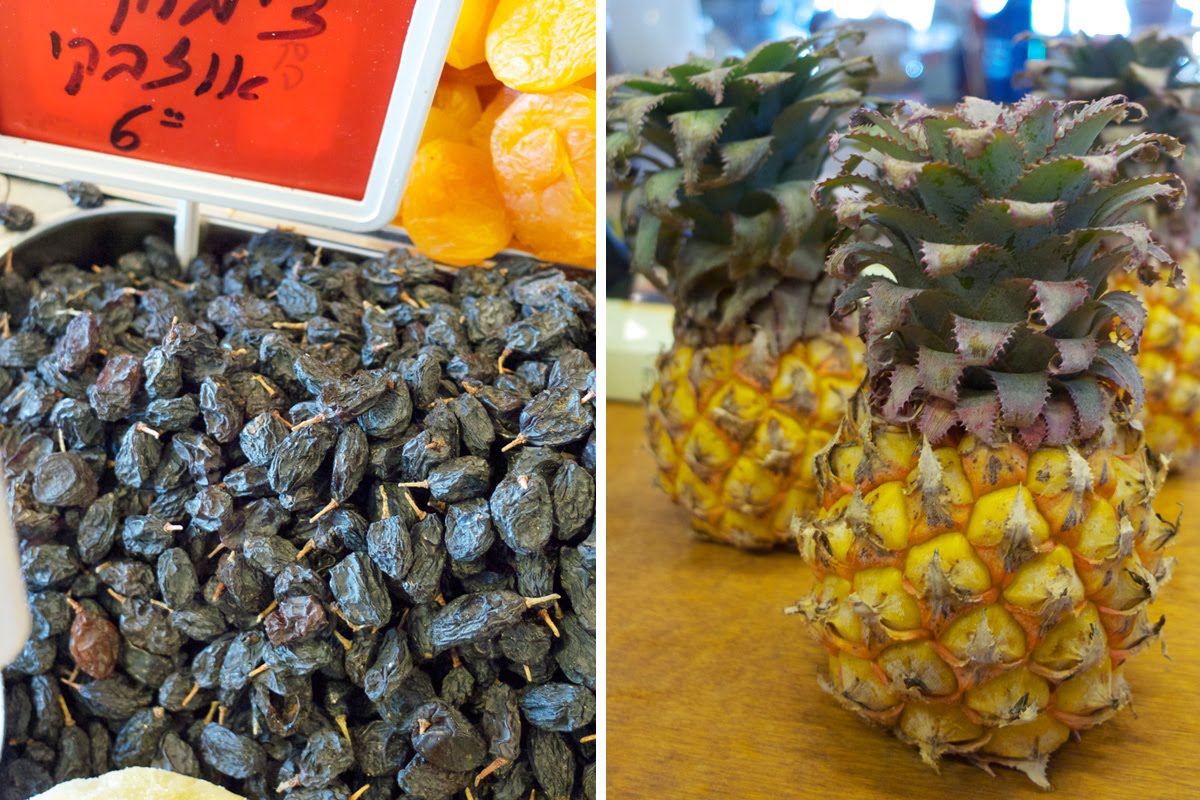
White asparagus, purple basil, onion blossoms and fresh turmeric root have all become viable ingredients, and how easy they make it indeed, to forget that on a scale, between commodity and luxury, they tilt heavily towards the luxury corner.

I treat them like a bright red lipstick; not for everyday use but on occasion yes, that extra touch of glamour goes that extra step and, well, designer clothing will dig a far bigger hole in my bank account.
So I there’s my justification for adding a little glamour to the kitchen in the form of asparagus or a perfectly reduced version of a pineapple that was raised with whispers of love and strokes of affection.

I do, however, always return to the comforts of comfort, because as much as those heels are drop dead sexy, snickers will forever be more comfortable. A dense, thick-crusted bread with salted butter, rice topped with a poached egg and a bowl of hearty stew with added shaved parmesan are more then enough to satiate the hunger within. One such dish is this bowl of beans, cooked as I learned in Florence not too long ago, but now long gone.

Tuscany is known for the freshness of its beans when in season and this dish truly captures the effortless red lipstick of food, with a quintessential heavy Italian Acc-a-cent.

Beans, they way I remember Tuscany

Roughly based and heavily adapted from a recipe published in Jamie Oliver's Jamie’s Italy

serves 4


500g dried or fresh Borlotti beans (cannelloni, butter or zolfini beans will work too)

1 potato, peeled

2 ripe tomatoes, crushed

½ bulb of garlic

A bunch of fresh herbs (rosemary, thyme, sage and bay leaves)

Extra virgin olive oil

For the sauce:

3-4 garlic cloves, sliced thinly

3-4 ripe tomatoes, peeled and chopped

3-4 sage leaves

1 green chilli, chopped finely

Lemon juice, freshly squeezed

Sea salt, to taste

Freshly ground pepper, to taste

  1. If using dried beans soak overnight in a large bowl covered with cold water. Drain and rinse.
  2. In a large saucepan, place the beans, potato, crushed tomatoes. Garlic and herbs. Drizzle with olive oil, place over the heat and bring to a boil.
  3. Skim any froth from the surface and simmer gently for about 40 minutes, until the beans are soft and tender.
  4. Drain the beans, discarding of the all but 1 cup of the cooking water. Set aside.
  5. Heat a glug of olive oil in a large skillet. When the oil is hot fry the green chilli for a few seconds, then stir in the garlic, sage leaves and tomato chunks. Cook for a few minutes until the tomatoes have come apart into a thick sauce. Pour the cup of cooking water and bring to a gentle boil. Season with salt and pepper.
  6. Stir in the cooked beans and add the lemon juice. Taste and adjust the seasoning if needed.
  7. Drizzle olive oil and serve.

Saturday, 2 April 2011

Brown butter, banana and walnut cookies

This is an ode to a cookie. Sometimes all one ever wants is a chewy, succulent and juicy cookie. A cookie that’s large enough to satisfy such a craving and last an entire cup of coffee, but without sliding down a slippery slope to hedonism. A cookie that’s not too flat, nor too tall, that manages to strike a balance between the chewiest of cakes and the crispiest of cookies. I walked around the city last week in search for my morning coffee and a cookie to satisfy my lust, yet day after day I came back with nothing.

Why it is that the universe thinks I should be baking the cookie of my dreams instead of finding a cookie and then fall for it is beyond me, but I am not one to sit around and wait for a cookie to possibly be everything I want in a cookie. I was left with no choice and decided to bake the cookie of my dreams myself. What began by browning butter (like most good stories do) ended up as these cookies.

I shared the first batch and that was followed by a second batch, though I had to double the quantity. I shared some more, then I wrote about them in my column and now I’m posting them here. They are simply too good to keep from the world and I think the world should know. The second best thing to eating these cookies straight from the oven is having the recipe for how to make them.

Lets call it my humble attempt at making the world a better place. One cookie at a time.

Brown butter, banana, and walnut cookies

Makes 12 large and satisfying cookies.

Ingredients

100 g butter, diced

1 cup AP flour

½ tsp salt

½ tsp baking soda

½ tsp baking powder

¾ cup raw cane sugar

1 egg

1 ripe banana, pureed

1 tsp (real) vanilla extract

1 cup walnuts, chopped roughly

½ cup dark chocolate chips, optional

  1. Prepare the brown butter: Place the diced butter in a heavy skillet over a medium flame, stirring it frequently with a whisk. Once melted the butter will begin to bubble and it is at this point you need to watch it from burning. Brown butter turns to a dark, charred butter in seconds. Once the air fills with a nutty sweet the butter is ready. Transfer the brown butter to a small bow, in order to stop it from browning any further. Set aside and allow to cool to room temperature.
  2. In a bowl, mix the flour, salt, baking soda and baking powder.
  3. In a separate bowl, place the brown putter and the sugar. Using a hand or electric whisk, beat until you have a smooth and creamy mixture. Add the egg and beat well until the mixture is light and airy.
  4. Mix in the pureed banana and the vanilla extract to combine.
  5. Add half the flour mixture and mix for 15 seconds. Add the remaining flour mixture and mix just until combined.
  6. Fold the walnuts and chocolate chips, if using, into the batter. Cover with cling film and place in the refrigerator for at least 6 hours (and up to 5 days).
  7. Preheat the oven to 190C and line a baking tray with parchment paper.
  8. Using an ice cream scooper, scoop the cookie dough to balls and place on the tray, well spaced apart.
  9. Bake for 12-14 minutes, turning the baking tray halfway through. The cookies are done when the edges turn golden brown.
  10. Remove from the oven and allow to cool for 5 minutes before transferring to cool on a wire rack.
  11. Store at room temperature in an airtight container for up to 3 days.

Monday, 28 March 2011

Spring break

Spring came knockin' and the annual Israeli SlowFood meeting, way up in the North of the country made for a worthy excuse to bake some cookies, pack a small bag and head out to the countryside. Thats the thing with cities. Seasons come and go, but one can never really tell, certainly not by looking at the watermelons and grapes already decorating market stands and supermarket shelves...
The countryside did not disappoint and we managed to squeeze two weeks of rustic air in less then 48 hours, including a freshly squeezed red grapefruit juice directly from the orchard and a festive spring potluck with the best of spring produce and some mighty fine alcohol. Nature came in the form of bird watching from a camouflaged trolley at Lake Hula (not so much lake as swamp) as unknowingly to them, thousands of storks and cranes were being watched by several birds of prey and eager tourists as they leisurely rested in between hours of flight from Africa to Europe.
This weekend was about soaking up a thousand shades of green and hundreds shades of pink, inhaling the aromas of fragrant herbs and blossoms as well as the stench coming in waves from a nearby cowshed or the odd muddy swamp. Lest not forget the several sneezes, bites and itches, greetings from local bugs and insects.
Its the short breaks that feel the longest and after 2 days in nature I was ready for home, my bed and city noise. Nature is rather exhausting.

Saturday, 19 March 2011

Poppy seed cupcakes with toasted almonds & chocolate fudge

Purim is here, the one holiday of the year dress up and intoxication are considered as 'tradition'. Traditional purim food is all about sugar and dough and can be categorized to 2 main schools of pastry: the east European variety consists mainly of either shortbread or sweet yeast pastry filled with poppy seeds or dried fruit (prunes or dates, ie what was available during the cold European winters), while the Mediterranean pastries consist of different versions of deep fried dough drenched in sugar syrup.

Following visits to an Iraqi and Tripolitanese pastry shops in the week leading to Purim, I’ve had my share of deep fried pastries and hydrogenated oil for the near future and so I decided to play around, baking poppy seeds.

Poppy seeds have quite a troubled reputation, and in a way, rightfully so. You see, if poppy seeds are ground they begin to taste bitter and stale within hours, and since this is how they’re sold in supermarkets, people have grown to assume this is what they taste like. Nasty.

Truth is, freshly ground poppy seeds are nutty and sweet and nothing like the nasty pre-ground version. I baked these cupcakes for Sabrina's Purim/Birthday party. These are a combination between a poppy seed loaf cake (turned cupcakes) and an ice cream flavor close to my heart, essentially apoppy seed & almond tart thrown inside an ice cream maker. heavenly.

If there’s one thing that will determine the success of these cupcakes it’s grinding the poppy seeds right before they’re ready to be used. The longer time passes between grinding and baking the sweet, nutty poppy seeds will begin to taste bitter and stale and generally awful. They can be ground using a spice or coffee grinder. Alternatively, buy them in a spice shop, ground to order, then rush home and keep them sealed in the freezer.

If you want to read more about Purim and its pastries, this is a link to an article published earlier this week on the NYTimes.

Poppy seed cupcakes

with toasted almonds & chocolate fudge

Adapted heavily from ‘Orna & Ella’

Makes approx 15 cupcakes


125g poppy seeds, freshly ground

2 heaped tbs all-purpose flour

3 heaped tbs breadcrumbs

100g butter, room temperature

1/3 cup sugar

4 eggs yolks

¼ tsp vanilla extract

1/8 almond extract


4 egg whites

2 tbs sugar

A pinch of salt


Chocolate fudge topping

100g dark chocolate (min. 70% cocoa solids), chopped

25g golden syrup

25g butter


A handful of slivered almonds, sliced and toasted

  1. Preheat the oven to 170C. Butter and flour a cupcake tin and set aside.
  2. Place a tin large enough to accommodate the cupcake tin and fill it with water to a height of 2cm.
  3. In a small bowl, combine the ground poppy seeds, flour and breadcrumbs. Set aside
  4. Using an electric hand whisk, cream the butter and sugar until light and fluffy.
  5. Add the eggs, one at a time, whisking well after each addition.
  6. Add the vanilla and almond extract and whisk until incorporated.
  7. Gradually add the poppy seed-flour mixture, whisking it on the lowest setting until almost combined. use a spatula for the last few turns, until combined.
  8. In a clean bowl, use the highest setting on your electric hand whisk to whisk the egg whites, salt and sugar to stiff peaks.
  9. Fold 1/3 of the egg whites into the poppy seed mixture. Add the remaining egg whites and fold until incorporated.
  10. Spoon the mixture into the tin and bake in the oven for 20 minutes or until a toothpick inserted in to the middle of a cupcake comes out clean.
  11. Remove from the oven. Once cool enough to handle transfer to a rack to cool completely.
  12. While the cupcakes are cooling away prepare the chocolate ganache: Place the chopped chocolate in a heatproof bowl and over a saucepan of simmering water (a double-boiler), until the chocolate has melted (make sure the bottom of the bowl isn’t touching the water).
  13. Add the butter and golden syrup and stir until smooth.
  14. Spread the fudge over the cupcakes and decorate with toasted almonds. Allow it to cool.

Saturday, 12 March 2011

Fresh Garlic confit

Its almost mid march. Thats a spit away from a fully blown spring. When did that happen?

This time of the year goes by so quickly, but for now the almond trees are in full bloom and, like lanterns showing the way, I see them scattered along the highway leading to Jerusalem.

At the market, alongside tomatoes, melons and grapes that are oddly offered and on display, the stalls are bursting with all sorts of green: there's spinach, peas and string beans, artichokes, fava, and an elusive favorite, the green garlic.

Most of the year one can mostly get a hold of dry imported garlic from China, but around this time of year the fragrant green version pops up here and there and worth watching out for.

The other day I was out market and bought a bunch. The garlic is sold with the thick stem and leaves still attached and this serves 2 needs; a) it looks good, all fresh and straight from the ground, but b) when put on the scale, the garlic weighs more, ending with the customer paying more for less. gotta love it. When I suggested to the vendor to do it the other way around I was met with a sniggering laugh. I must have been kidding. I returned home, poorer yet richer, with tagged by a garlicky cloud that followed me all the way back home.

The layers that dry up and flake away are fresh and fragrant. These I like to chop into a salad or soup. Using them up makes way for bright white garlic cloves that ooze a pungent freshness. There has got to be a way to hold on to these for longer. There is. Green garlic confit. The closest thing to stopping time.

There isn’t a recipe as such, the thing to do is buy quite a few, and prepare enough confit to last you for some time.

Garlic confit

Green garlic, separated to cloves (you can cook with the fresh leaves, so don’t throw them away)

Olive oil

Place the garlic cloves in a saucepan so that they reach halfway of its hieight.

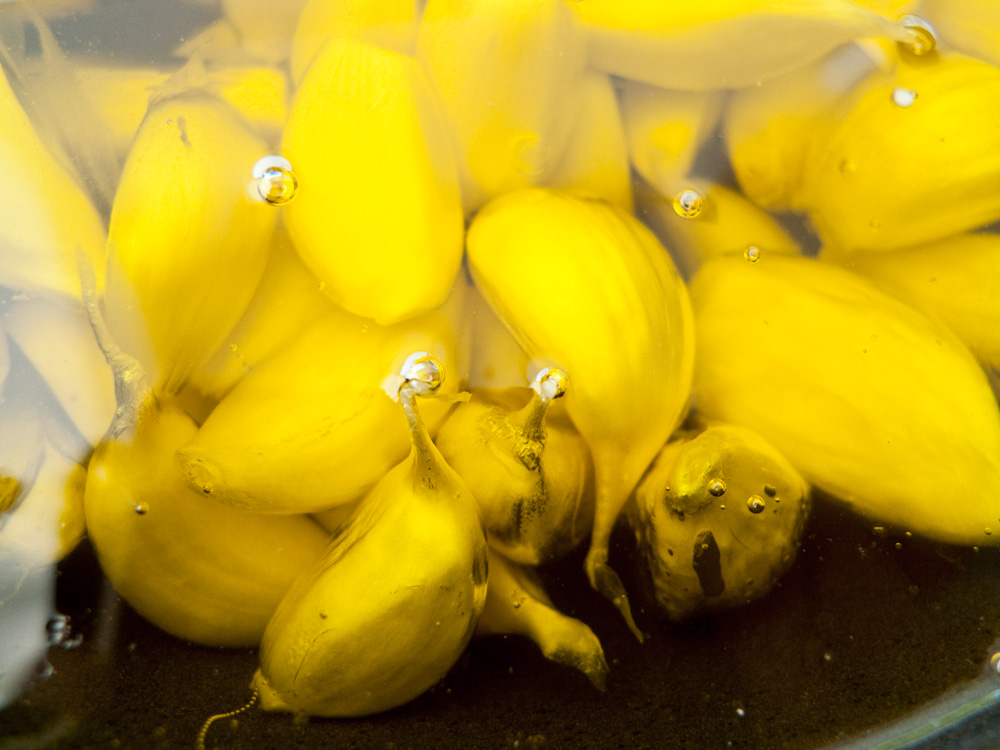
Cover with plenty of olive oil and cook over medium- low heat.

The temperature shouldn’t be too high and small bubbles will gently rise to the surface but it mustn’t boil or simmer. We want the garlic to cook in the oil, not deep-fry it.

Cook the garlic for about 30 minutes or until the cloves softened. Set aside and allow to cool.

Transfer the garlic and the now aromatic olive oil to a clean jar and store in the fridge.

Remember to use only clean utensils to scoop the cloves out or drizzle the oil.

That’s it. A little work will take you along way. These are wonderful on toast with anchovy and rubbed tomato, as pasta dressing, with olive oil, salt and pepper, or minced and rubbed over flat dough, sprinkled with crushed salt and rosemary needles for a garlicky pizza.

The olive oil is the cherry on top, having been infused with the garlic. For immediate elevation use it to fry your omelettes, baked goods or anything else you use olive oil for.

Saturday, 5 March 2011

Spelt and lima bean mujadara

I grew up in Jerusalem but left as soon as I could. Its been a love-hate relationship ever since. For years it was strictly an ‘in & out’ arrangement, where I would come to my parents’ house and head back as soon as I could to modern civilization. Anything more was too much to handle.

I’ve been spending more time in the city recently for food purposes and I find am making peace with it through my stomach.

Once it stopped being a threat, attempting to swallow me back and suffocating me inside its dense stone walls I allowed myself to rediscover it, its timelessness quality and that je ne sais qua quality that gets people to lose their mind and fight over it, as if it could be won and be owned.

The heavy, overbearing seriousness with which reality is grasped by is refreshing, be it for a few hours at a time and it is nothing short of a trip abroad less then an hour away, as well as back in time.

Once again the power of food proves itself as a peacemaker and a softener of the heart.

I recently made mujadara, a dish that could probably spark yet another right of ownership war, as is the case with most dishes local to the region. It usually consists of lentils and either rice or bulgur, but I decided too give it a facelift and make it my own. I replaced the grains with spelt kernels, the lentils with lima beans and the yogurt topping for sheep’s milk feta cheese, leaving the fried onions (aka the best bit), untouched. With carbs, proteins, cheese, aromatic herbs, a satisfying crunch and a bouncing bite all in attendance and at their sharpest the only thing missing is dessert.

Spelt and lima bean mujadara

Serves 2


Ingredients

Olive oil

1 cup whole spelt kernels

1 cup lime beans, soaked in water overnight and cooked in boiling water until softened, about 35 minutes

1 red onion, chopped finely

1 sprig of rosemary, needles separated

½ lemon, freshly squeezed

Freshly ground pepper, to taste

Sea salt, freshly ground, to taste


Serve with

1-2 tbs sesame seeds, lightly roasted in a dry pan, then ground in a mortar & pestle

A handful of peanuts, lightly roasted and chopped

Sheep’s milk feta cheese, crumbled


  1. Place the spelt kernels in a medium sized saucepan, pour 1 ½ cups of water and bring to a boil over medium- high heat. When the water is simmering, cover and cook over a low heat for 45 minutes. Remove from the heat and set the saucepan aside, still covered, for about 5 minutes. Use a spatula to fluff the spelt.
  2. While the spelt is cooking heat a little olive oil in a frying pan. add the chopped onion and fry over a medium- low heat until fried and crispy, but not charred.
  3. In a large bowl, add the cooked spelt lima beans and the fried onion. Add the rosemary and season with salt, pepper, olive oil and lemon juice. Taste and adjust seasoning, if needed.
  4. Transfer to a serving plate and serve warm, sprinkled with ground sesame seeds, chopped peanuts and crumbled feta cheese.